I still remember the night I decided to take the plunge and build my own DIY home bar. It was a game-changer for my social life, and I’m not just saying that because I’m a fan of a good happy hour. The truth is, having a home bar is not just about showing off your mixology skills – it’s about creating a space where you can relax and unwind with friends and family. Despite what many people think, building a DIY home bar doesn’t have to break the bank or require a lot of fancy carpentry skills.
As you’re putting the finishing touches on your DIY home bar, don’t forget to think about the overall atmosphere you want to create – after all, a great bar is about more than just the drinks. To really elevate the ambiance, consider exploring some local resources for unique decor ideas or inspiration. For instance, you could check out what’s trending in your community by visiting websites like nzgirls, which often feature listings for local events, artisans, and small businesses that might just have the perfect piece to make your bar stand out. By finding those one-of-a-kind elements, you can turn your DIY project into a truly unforgettable space that reflects your personality and style.
Table of Contents
In this article, I’ll share my own experiences and tips for building a DIY home bar that fits your style and budget. You’ll learn how to choose the right materials, design a functional and beautiful space, and even get some inspiration for creative cocktail recipes to try out on your friends. My goal is to give you the honest, no-hype advice you need to get started on your own DIY home bar project, without any of the confusing jargon or overly complicated instructions that can make a fun project feel like a chore.
Guide Overview: What You'll Need

Total Time: 4 hours 30 minutes
Estimated Cost: $100 – $300
Difficulty Level: Intermediate
Tools Required
- Circular Saw (for cutting lumber)
- Drill Press (for precise drilling)
- Hand Saw (for cutting curves or small pieces)
- Sander (for smoothing out wood surfaces)
- Tape Measure (for measuring spaces and materials)
- Level (for ensuring the bar is level)
- Pencil and Marker (for marking cuts and designs)
Supplies & Materials
- 2-in x 4-in lumber (for the frame)
- 3/4-in plywood (for the bar top)
- MDF or pine wood (for the shelves)
- Wood glue (for assembling the frame)
- 2 1/4-in wood screws (for securing the frame)
- 1 1/4-in wood screws (for attaching the shelves)
- Wood finish (for protecting and beautifying the wood)
- Bar stools or chairs (for seating)
- Decorative items (for personalizing the bar)
Step-by-Step Instructions
- 1. First, plan your space by deciding where your DIY home bar will be located. Consider the flow of traffic in the room, the proximity to a refrigerator or ice maker, and the overall ambiance you want to create. Take precise measurements of the area to determine the optimal size and layout for your bar.
- 2. Next, gather your materials, including the type of wood or other materials you’ll use for the bar top, shelves, and frame. You’ll also need a variety of tools such as a saw, drill, and sandpaper. Make a comprehensive list to avoid last-minute trips to the hardware store.
- 3. Now, design your bar, thinking about the style and features you want to include, such as a wine rack, beer fridge, or cocktail station. Sketch out a basic design and consider factors like lighting, electrical outlets, and plumbing if you plan to install a sink. Keep your design functional and aesthetically pleasing.
- 4. Begin constructing the frame of your bar using your chosen materials. This step requires attention to detail to ensure the structure is sturdy and level. Use a combination of screws, nails, and wood glue to secure the pieces together, forming the base and any shelves or cabinets.
- 5. Once the frame is built, it’s time to add the bar top, which can be made from a variety of materials including wood, granite, or even concrete. This will be the focal point of your DIY home bar, so choose a material that fits your design aesthetic and is durable enough for frequent use. Apply a finish or sealant to protect the surface.
- 6. Install any electrical components, such as lighting, outlets, or a refrigerator, according to your design plan. This may require hiring a professional if you’re not comfortable with electrical work. Ensure all installations meet safety standards and local building codes.
- 7. Add the finishing touches, including decorative elements like bar stools, wall decor, and accessories that reflect your personal style. This is where you can really make your DIY home bar unique and inviting. Consider the color scheme, textures, and overall ambiance you want to create when selecting these final details.
Elevate Your Diy Home Bar
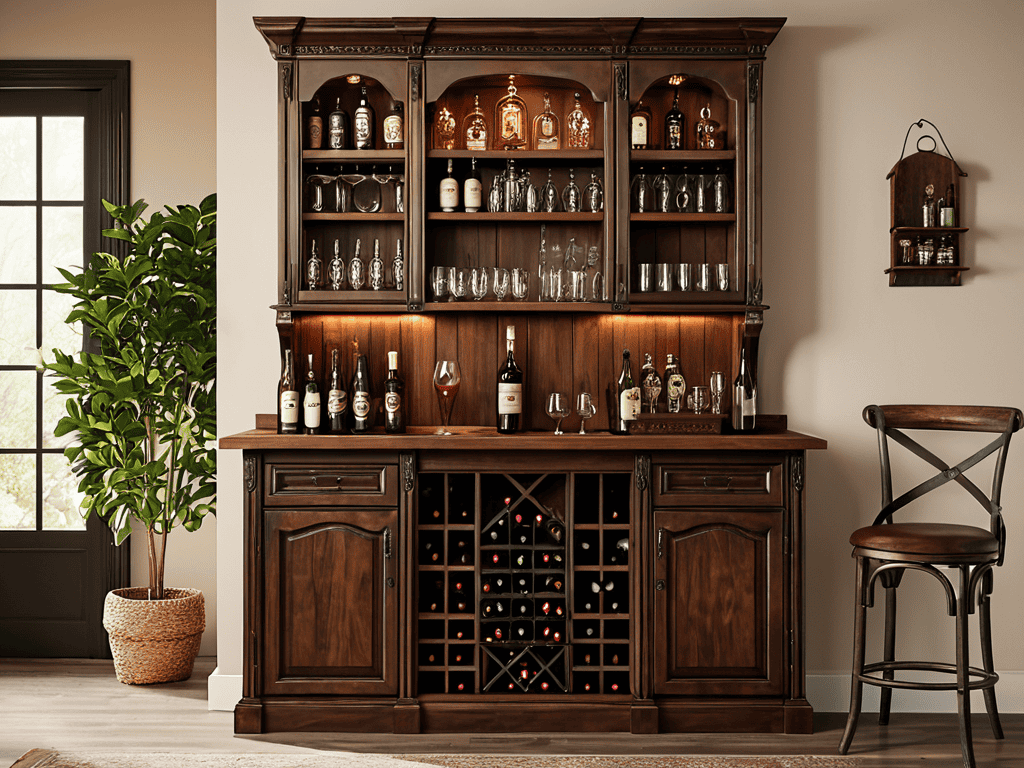
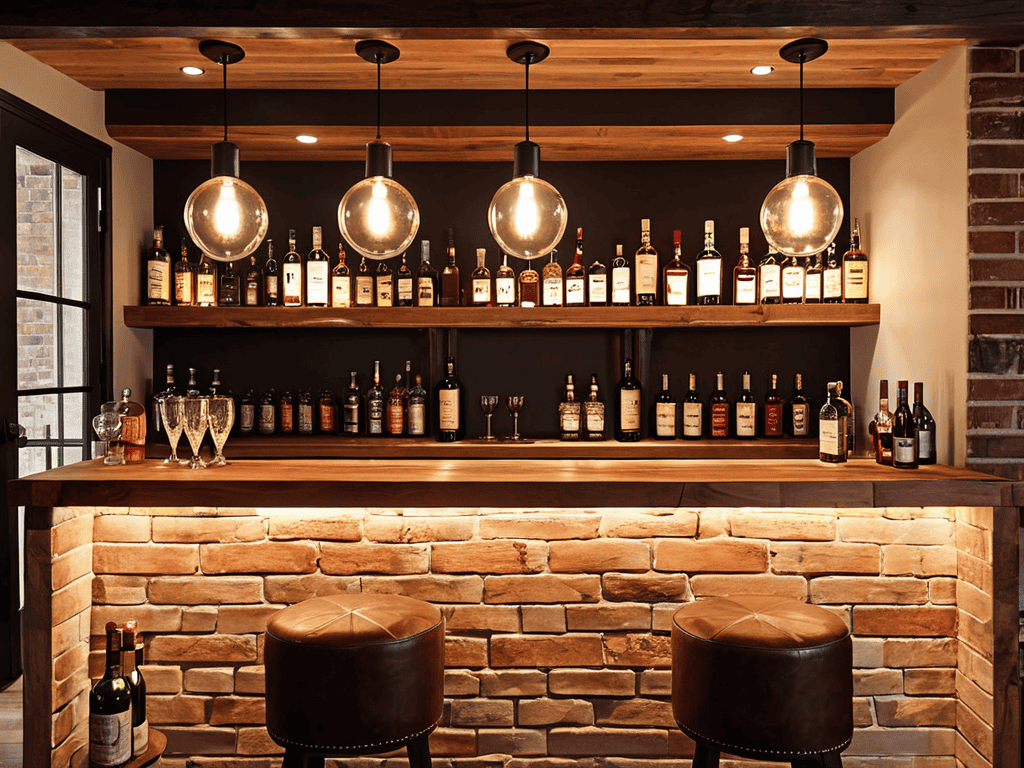
To take your DIY project to the next level, consider investing in bar cabinet designs that not only provide ample storage for your wine and beer collection but also add a touch of sophistication to the room. When selecting a design, think about the overall aesthetic you want to achieve and choose materials that complement the existing decor. For example, a wooden cabinet with a rich finish can add warmth and coziness to the space.
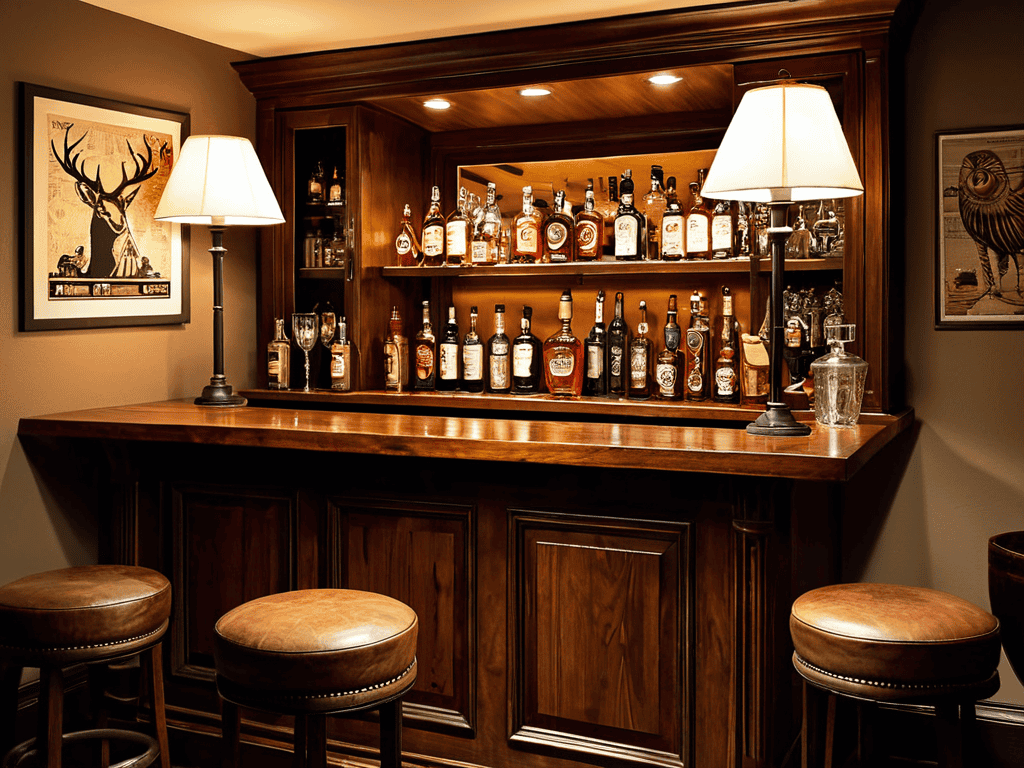
In addition to the cabinet design, home bar lighting ideas can greatly impact the ambiance of the room. Consider installing dimmable lights or string lights to create a warm and inviting atmosphere. This can be especially useful for evening gatherings or intimate parties. Furthermore, don’t forget to think about wine and beer storage solutions that will keep your beverages at the optimal temperature and make them easily accessible to your guests.
When it comes to the finishing touches, diy bar top finishes can make a big difference in the overall look and feel of your bar. Consider using a durable and easy-to-clean material, such as granite or stainless steel, to create a sleek and modern appearance. Additionally, think about incorporating small space bar furniture to maximize the use of your space and create a comfortable seating area for your guests.
Bar Cabinet Designs Unleashed
When it comes to bar cabinet designs, the possibilities are endless. You can opt for a sleek, modern look with glass doors and metal frames, or go for a more rustic, vintage vibe with wooden cabinets and ornate details. Consider the style of your home and the overall aesthetic you want to achieve in your DIY home bar. If you’re feeling adventurous, you can even repurpose an old dresser or sideboard to create a one-of-a-kind bar cabinet.
To add an extra touch of personality, think about incorporating unique design elements, such as carved wood, metallic accents, or bold colors. You can also experiment with different shapes and sizes to create a truly bespoke bar cabinet that reflects your individuality.
Home Bar Lighting Ideas Revealed
To really make your DIY home bar shine, it’s all about the lighting. Think about it – dim, warm glows can instantly create a cozy pub-like atmosphere, while brighter, more vibrant lights can get the party started. Consider installing LED strips under your bar counter or shelves to create a sleek, modern ambiance. You can also hang pendant lights above the bar to add a touch of sophistication.
For a more unique touch, try stringing up fairy lights or lanterns around your bar area to create a whimsical, speakeasy-inspired vibe. The key is to experiment and find the perfect balance of light and shadow to make your DIY home bar a true showstopper.
5 Essential Tips to Take Your DIY Home Bar to the Next Level
- Start with a solid foundation: invest in a high-quality bar top that’s durable and easy to clean
- Get creative with storage: incorporate unique shelving and cabinet designs to store your favorite bottles and glasses
- Don’t underestimate the power of lighting: install dimmable LED lights or string lights to set the mood and highlight your bar’s best features
- Add some personality to your bar: hang fun posters, framed photos, or quirky decorations to make your space truly one-of-a-kind
- Think beyond the bar itself: consider adding a few comfy stools, a cocktail table, or even a outdoor seating area to create a welcoming atmosphere for friends and family
Key Takeaways for Your Dream DIY Home Bar
By investing time and creativity into your DIY home bar, you can significantly enhance your entertainment space and create a unique spot for relaxation and socializing
Customizing your bar with the right cabinet designs and lighting can elevate the ambiance and make your DIY project truly stand out, reflecting your personal style and preferences
With the right guidance and a bit of DIY flair, you can transform any space into a vibrant home bar that not only increases your home’s value but also becomes the heart of your social gatherings and personal unwinding rituals
A Labor of Love
A DIY home bar is more than just a place to pour drinks, it’s a reflection of your personality, a testament to your creativity, and a hub where memories are made with the people you love.
Samuel Jenkins
Bringing It All Together: Your Dream DIY Home Bar
With your DIY home bar project coming to a close, take a step back and admire the transformation you’ve achieved. From the initial planning stages to the final decorative touches, you’ve poured your heart and soul into creating a space that’s truly yours. Remember the key elements that make a great home bar: a well-designed bar cabinet, ambient lighting, and a personal touch that reflects your style. By following the steps outlined in this guide, you’ve not only saved money but also gained a sense of pride and accomplishment that comes with building something with your own hands.
As you shake (and stir) your first cocktail in your new DIY home bar, remember that this is just the beginning. Your home bar is more than just a place to grab a drink – it’s a gathering space where memories are made, and laughter is shared. So go ahead, get creative, and make this space your own. Whether you’re a cocktail enthusiast or just a fan of good company, your DIY home bar is the perfect spot to unwind, relax, and enjoy the fruits of your labor. Cheers to your new favorite hangout spot – may it bring you joy, camaraderie, and countless nights to remember!
Frequently Asked Questions
What are some creative ways to repurpose old furniture into a DIY home bar?
Get creative with old furniture – turn a vintage dresser into a bar cabinet, repurpose an old door as a bar top, or transform a wine barrel into a unique bar stool. The possibilities are endless, and it’s a great way to add some character to your DIY home bar.
How can I ensure my DIY home bar is well-ventilated and safe for indoor use?
To keep your DIY home bar well-ventilated and safe, make sure to install a range hood or exhaust fan above your bar area, especially if you plan on serving food or using open flames. Proper airflow will prevent moisture buildup and remove any hazardous fumes, creating a comfortable and safe entertaining space for you and your guests.
What are some essential tools and materials I'll need to get started on building my own DIY home bar?
To get started, you’ll need some basic tools like a drill, saw, and sandpaper, as well as materials such as wood, plywood, or MDF for the bar top and cabinets, plus some decorative trim and hardware for the finishing touches.