I still remember the year I decided to ditch the store-bought advent calendars and create my own magical countdown to Christmas. It was a game-changer. As I embarked on making a guide to making a DIY advent calendar for Christmas, I realized that it’s not just about the end result, but the journey itself. The process of crafting something with your own hands, filling each day with a personal touch, and watching your loved ones enjoy it, is truly special.
In this article, I promise to share my honest, no-fuss approach to creating a DIY advent calendar that will make your Christmas season even more joyful. You’ll get practical tips and straightforward advice on how to make a beautiful, functional, and meaningful calendar that reflects your personality and style. Whether you’re a crafting novice or a seasoned pro, this guide will walk you through each step, ensuring that your DIY advent calendar turns out to be a heartwarming masterpiece that you and your family will treasure for years to come.
Table of Contents
- Guide Overview: What You'll Need
- Step-by-Step Instructions
- A Guide to Making a Diy Advent Calendar for Christmas
- 5 Essential Tips for a Magical DIY Advent Calendar
- Key Takeaways for a Magical DIY Advent Calendar
- Sparking Joy in the Holiday Season
- Wrapping Up Your Handmade Countdown
- Frequently Asked Questions
Guide Overview: What You'll Need

Total Time: 2 hours 30 minutes
As you’re planning your DIY advent calendar, don’t forget to think about the little ones who might be helping you with the project. For a fun and stress-free holiday season, it’s essential to have some kid-friendly activities up your sleeve. If you’re looking for inspiration, I recommend checking out some local event listings, such as those found on sexinhannover, to see what’s happening in your area. You might stumble upon a holiday market or a fun workshop that the whole family can enjoy together, making your handmade advent calendar an even more special and memorable part of your holiday tradition.
Estimated Cost: $20 – $40
Difficulty Level: Easy
Tools Required
- Scissors (sharp)
- Glue Gun (with extra glue sticks)
- Ruler (for measuring and cutting)
- Pencil (for marking dates and designs)
Supplies & Materials
- Cardboard or Cardstock (for calendar base)
- Colorful Paper or Foil (for decorating)
- Small Gifts or Treats (24-25 items for each day leading up to Christmas)
- Ribbons or Twine (for hanging and embellishing)
- Number Stickers or Markers (for labeling each day)
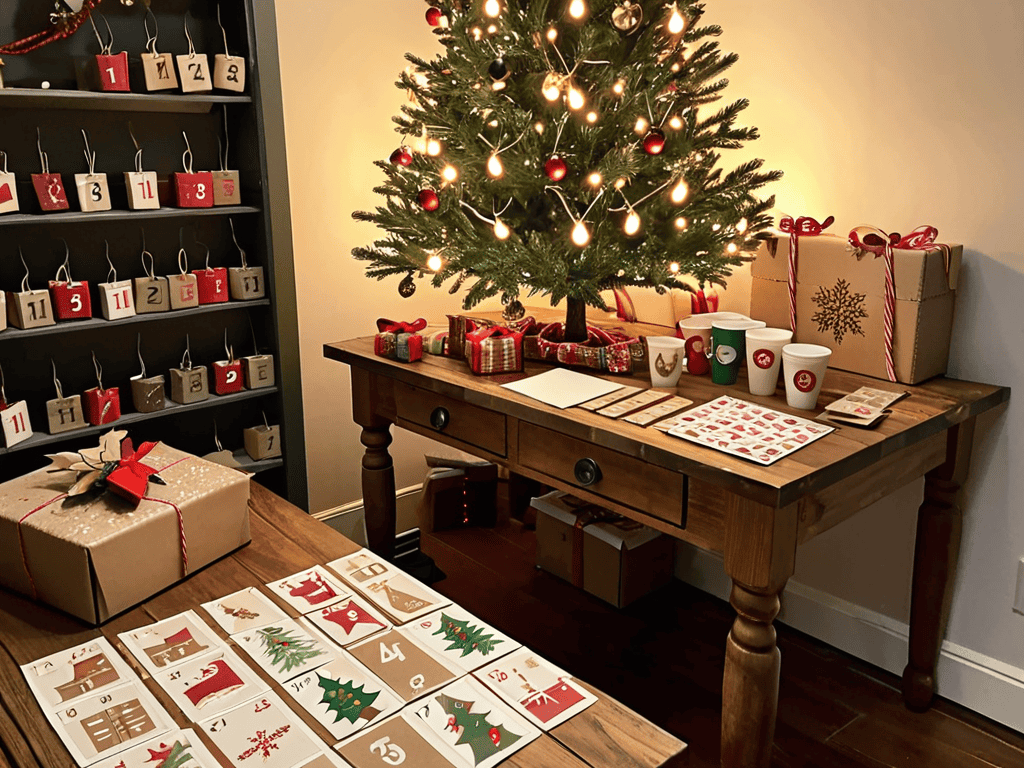
Step-by-Step Instructions
- 1. First, let’s start with the basics and gather our materials, which will include a piece of cardboard or cardstock, scissors, glue, markers or paint, and 24 small containers or bags to represent the 24 days leading up to Christmas. We’ll also need some festive decorations like ribbons, bows, or holly to give our advent calendar a personal touch.
- 2. Next, we’ll design the layout of our advent calendar, deciding how we want our containers or bags to be arranged. We can go for a traditional grid layout or get creative with a more whimsical design. This is the part where we can let our imagination run wild and have fun with the process, considering the theme of our calendar and how it will fit into our holiday decor.
- 3. Now, it’s time to create our containers, which can be as simple as decorating small paper bags or as complex as crafting tiny wooden boxes. We can use our markers or paint to add numbers and festive designs to each container, making sure they’re all unique and exciting. This step is all about adding a personal touch to each day’s surprise.
- 4. With our containers ready, we can start filling them with treats, which can range from small toys and candies to fun activities and puzzles. The idea is to make each day a surprise, so we should aim for a mix of sweet treats and engaging activities that will keep everyone excited and looking forward to the next day.
- 5. Once our containers are filled and ready, it’s time to assemble our advent calendar. We’ll use our glue to attach the containers to our cardboard or cardstock base, following the layout we designed earlier. This is where our project starts to come together, and we can see our hard work paying off.
- 6. To add an extra layer of festivity to our advent calendar, we can decorate the background with paint, markers, or even decoupage. This is our chance to get really creative and make our calendar a one-of-a-kind piece that reflects our holiday spirit. We can add holly, snowflakes, or any other design that fits our theme.
- 7. Finally, we’ll hang our advent calendar in a place of pride, where everyone can see it and enjoy the countdown to Christmas. We can use a piece of string or a ribbon to hang it on the wall or place it on a mantel, making sure it’s secure and ready for the fun to begin. This is the moment when our handmade countdown becomes a part of our holiday tradition.
A Guide to Making a Diy Advent Calendar for Christmas
As you embark on creating your handmade advent calendar, consider exploring various Christmas countdown ideas to make the experience even more special. You can find inspiration in _diy advent calendar templates_ available online or come up with your own unique design. The key is to make it personal and reflective of your holiday spirit.
When deciding on _handmade advent calendar designs_, think about the materials you want to use. Opting for recyclable advent calendar materials not only reduces waste but also adds an eco-friendly touch to your project. You can use old cards, fabric, or even reusable bags to create the calendar pockets. Fill them with exciting _advent calendar fillers_ like small toys, candies, or activities to enjoy each day leading up to Christmas.
To make your DIY advent calendar even more engaging, you might want to incorporate a special surprise for _Christmas Eve_. This could be a small gift, a favorite treat, or a fun family activity. Planning ahead and having all the materials ready will make the process enjoyable and stress-free. By putting thought into the details, you’ll create a one-of-a-kind handmade advent calendar that becomes a cherished part of your holiday tradition.
Handmade Advent Calendar Designs to Inspire
Let’s dive into some handmade advent calendar designs that will spark your creativity. From rustic wooden crates to festive fabric pockets, the possibilities are endless. You can create a winter wonderland scene on a large piece of cardboard or use a set of mini galvanized buckets to hang on a wall.
These unique designs will add a personal touch to your holiday decor and make your DIY advent calendar truly special. Whether you prefer a classic, traditional look or a more modern, eclectic style, there’s a handmade design to suit your taste and skill level.
Recyclable Materials for a Sustainable Countdown
To create an eco-friendly advent calendar, consider using recyclable materials that add a touch of sustainability to your countdown. Old cardboard boxes, paper bags, and fabric scraps can be transformed into unique and charming advent calendar components. Get creative with materials you might otherwise throw away, like empty tin cans, glass jars, or wooden crates. These items can be repurposed as containers for your daily treats or activities, reducing waste and making your DIY project even more special.
By choosing recyclable materials, you’ll not only reduce your environmental footprint but also infuse your advent calendar with a sense of resourcefulness and ingenuity. Plus, it’s a great way to involve the whole family in the creative process, teaching kids about the importance of reuse and recycling during the holiday season.
5 Essential Tips for a Magical DIY Advent Calendar

- Plan Ahead: Create a Theme and Schedule to Ensure a Stress-Free Countdown
- Get Creative with Containers: Think Beyond Traditional Boxes and Envelopes for a Unique Look
- Make it Personal: Add Photos, Names, or Special Messages to Make Each Day a Surprise
- Keep it Simple: Don’t Overcomplicate the Process, Focus on the Fun and Magic of the Season
- Make it a Family Affair: Involve Kids and Loved Ones in the Creation Process for a Truly Special Experience
Key Takeaways for a Magical DIY Advent Calendar
Create a personalized and interactive holiday experience with a handmade advent calendar that reflects your style and creativity
Get inspired by unique handmade designs and repurpose recyclable materials to reduce waste and make your countdown to Christmas more sustainable
Make it a fun and memorable activity by involving family and friends in the DIY process, and enjoy the excitement of counting down to Christmas together
Sparking Joy in the Holiday Season
As we craft our own DIY advent calendars, we’re not just counting down the days until Christmas, we’re weaving a tapestry of love, laughter, and memories that will warm our hearts for years to come.
Emily J. Miller
Wrapping Up Your Handmade Countdown
As we conclude this journey to create a truly unique DIY advent calendar, let’s reflect on the key takeaways: from choosing the perfect handmade design to incorporating recyclable materials for a sustainable countdown. We’ve explored various ideas and steps to make your Christmas celebration even more special and personalized. Whether you opted for a traditional or modern design, the process of crafting your own advent calendar is a fun and rewarding experience that gets you in the mood for the festive season. By making it yourself, you’re not only reducing waste but also creating a treasured family heirloom that can be enjoyed for years to come.
As you finish your DIY advent calendar and hang it proudly, remember that the true spirit of Christmas is about spreading joy and love. The handmade touch and personal effort you’ve put into your countdown will surely make this Christmas season even more magical. So, go ahead and unwrap the magic of the season with your beautifully crafted DIY advent calendar, and cherish the moments you spend with your loved ones as you count down to Christmas together.
Frequently Asked Questions
What are some creative ways to fill each day's compartment in my DIY advent calendar?
Let’s make each day a surprise! Fill your DIY advent calendar with treats like hot cocoa mix, candy canes, or small toys. You can also include fun activities like “make a snowflake” or “have a dance party.” Get creative and add personal touches like photos, stickers, or handwritten notes to make it extra special.
How can I make my DIY advent calendar more durable and long-lasting?
To make your DIY advent calendar more durable, consider using sturdy materials like thick cardboard, wooden crates, or canvas. Add a clear coat of varnish or Mod Podge to protect it from wear and tear. You can also reinforce the structure with glue, tape, or staples to ensure it withstands the 24-day countdown.
Are there any specific safety precautions I should take when making a DIY advent calendar with children?
When crafting with kids, safety first. Supervise them closely, especially with scissors, glue, and small materials. Ensure they understand the importance of handling fragile items with care and washing their hands after using materials like glitter or paint. With a little adult guidance, your mini makers can have a blast creating a magical DIY advent calendar.