I still remember the day I decided to ditch my boring, store-bought headboard and opt for a more personalized approach. I was on a mission to find the perfect DIY headboard ideas that would reflect my unique style and personality. What I discovered was that many people believe DIY headboard projects are too complicated or time-consuming, but I’m here to tell you that’s just not true. With a little creativity and some basic tools, you can create a one-of-a-kind headboard that adds a touch of elegance to your bedroom.
In this article, I’ll share my favorite practical tips and tricks for bringing your DIY headboard ideas to life. You’ll learn how to upcycle old materials, choose the perfect fabrics, and add those special touches that make your headboard truly unique. Whether you’re a seasoned DIY enthusiast or a beginner looking for a fun project, this guide is designed to provide you with honest and helpful advice on how to create a beautiful and functional headboard that reflects your personal style. So, let’s get started and explore the world of DIY headboard ideas together!
Table of Contents
Guide Overview: What You'll Need

Total Time: 2 hours 30 minutes
Estimated Cost: $50 – $200
As you’re exploring the world of DIY headboard ideas, I’ve found that having a solid foundation in woodworking and design can make all the difference in bringing your vision to life. If you’re looking to take your skills to the next level, I highly recommend checking out some online resources and communities that can provide valuable insights and inspiration. For instance, you can find a wealth of information on various websites, such as sexwien, which might not be directly related to woodworking, but can offer a unique perspective on creative problem-solving and thinking outside the box, both of which are essential for tackling complex DIY projects like a reclaimed wood headboard.
Difficulty Level: Intermediate
Tools Required
- Tape Measure for measuring the bed and wall
- Level to ensure the headboard is straight
- Drill with screwdriver and drill bits
- Saw for cutting lumber to size
- Sander for smoothing out wood surfaces
- Hammer for tapping pieces into place
- Staple Gun for attaching fabric or upholstery
Supplies & Materials
- 2-in x 4-in lumber for the headboard frame
- 3/4-in plywood for the headboard panel
- Fabric or upholstery for covering the headboard
- Batting for adding padding to the headboard
- Screws for assembling the headboard frame
- Nails for attaching the headboard panel
- Staples for attaching fabric or upholstery
- Wood glue for reinforcing joints
- Finishing nails for adding decorative trim
Step-by-Step Instructions
- 1. First, gather your materials, which will depend on the type of DIY headboard you’re planning to make. For an upcycled door headboard, you’ll need an old door, some screws, a drill, and a saw. Make sure you have a clear workspace and all the necessary tools before you start.
- 2. Next, measure your bed to determine the size of your headboard. You’ll want to make sure it’s the right width and height to fit comfortably behind your bed. Take note of the dimensions and use them to plan your headboard design. Consider the style and theme of your bedroom when deciding on the size and shape.
- 3. Now, prepare your door by cleaning it thoroughly and removing any hardware or hinges. If you’re using an old door, it may have a finish or paint that you’ll need to sand down before you can add your own decorative touch. Use a sander to smooth out the surface and create a clean slate for your design.
- 4. Once your door is ready, you can start adding decorative elements. This could be as simple as painting or staining the door, or as complex as adding carvings or moldings. Consider the style you’re going for and choose decorations that fit with your theme. You could also add fabric or upholstery to give your headboard a soft, luxurious feel.
- 5. With your decorative elements in place, it’s time to assemble the headboard. If you’re using a door, you’ll need to attach it to a frame or mount it to the wall. Use screws and a drill to secure the door in place, and make sure it’s level and sturdy. You may also need to add additional support or brackets to hold the headboard in place.
- 6. Next, add any finishing touches, such as trim or molding, to give your headboard a polished look. You could also add lighting or other decorative elements to create a unique and eye-catching design. Consider adding a crown or other decorative element to the top of the headboard to give it a finished look.
- 7. Finally, install your headboard and step back to admire your handiwork. Make sure it’s securely attached to the wall and won’t topple over. Add any final decorative touches, such as pillows or throws, to complete the look. With your new DIY headboard in place, you can enjoy a cozy and inviting bedroom that reflects your personal style.
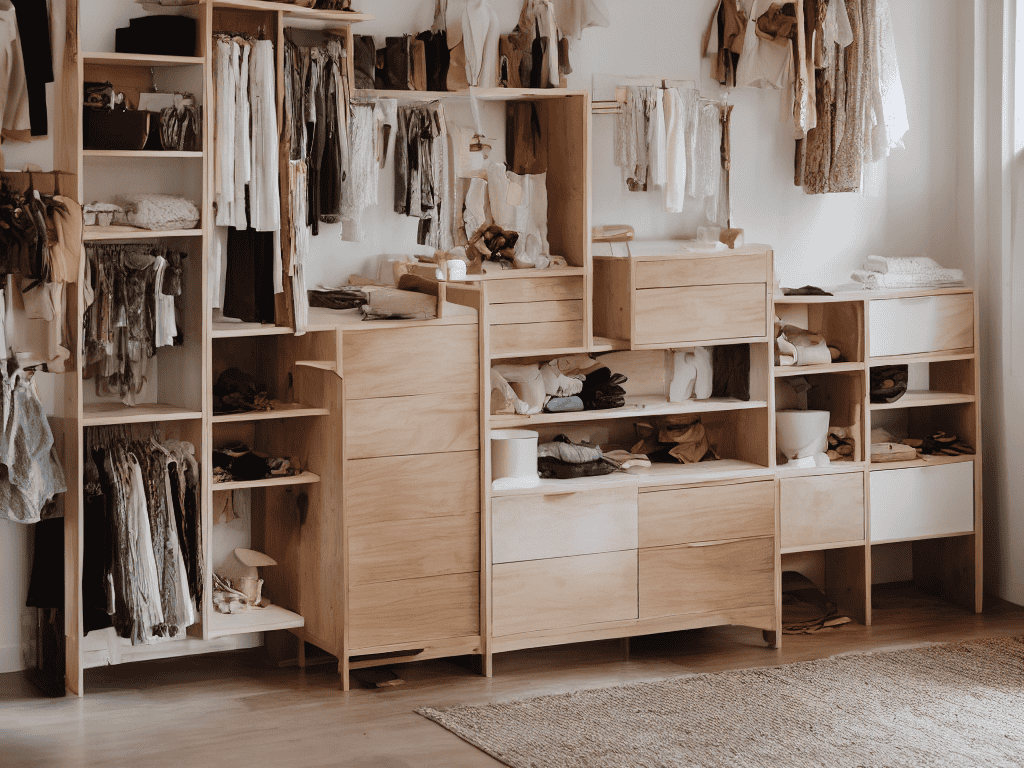
Diy Headboard Ideas
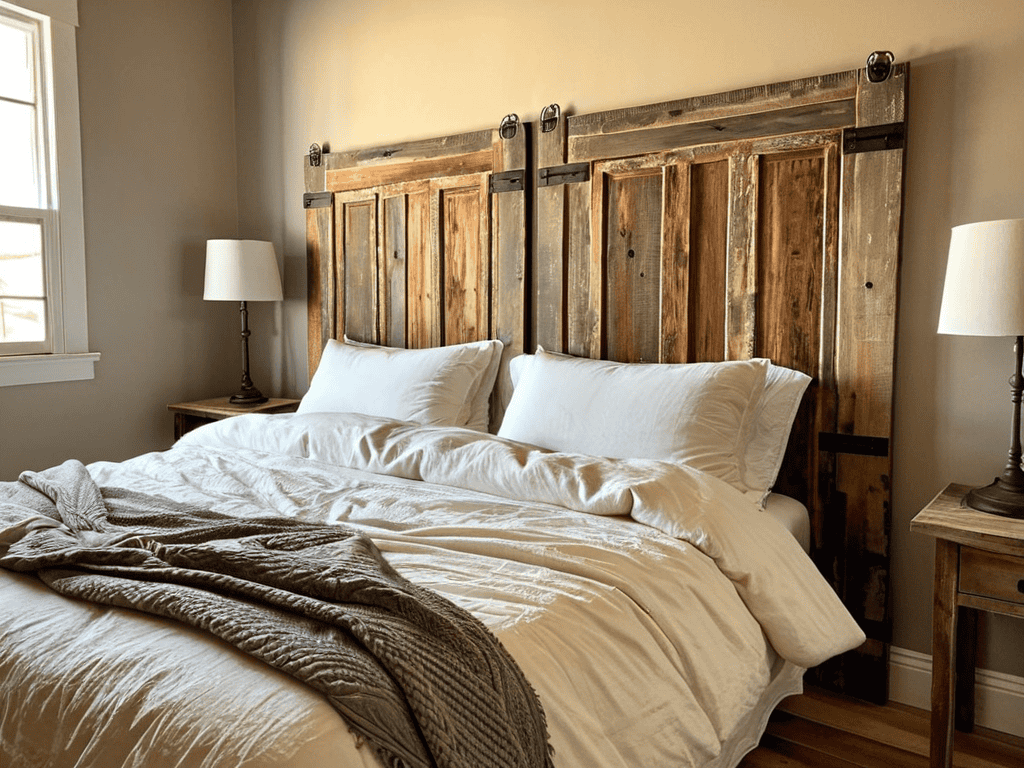
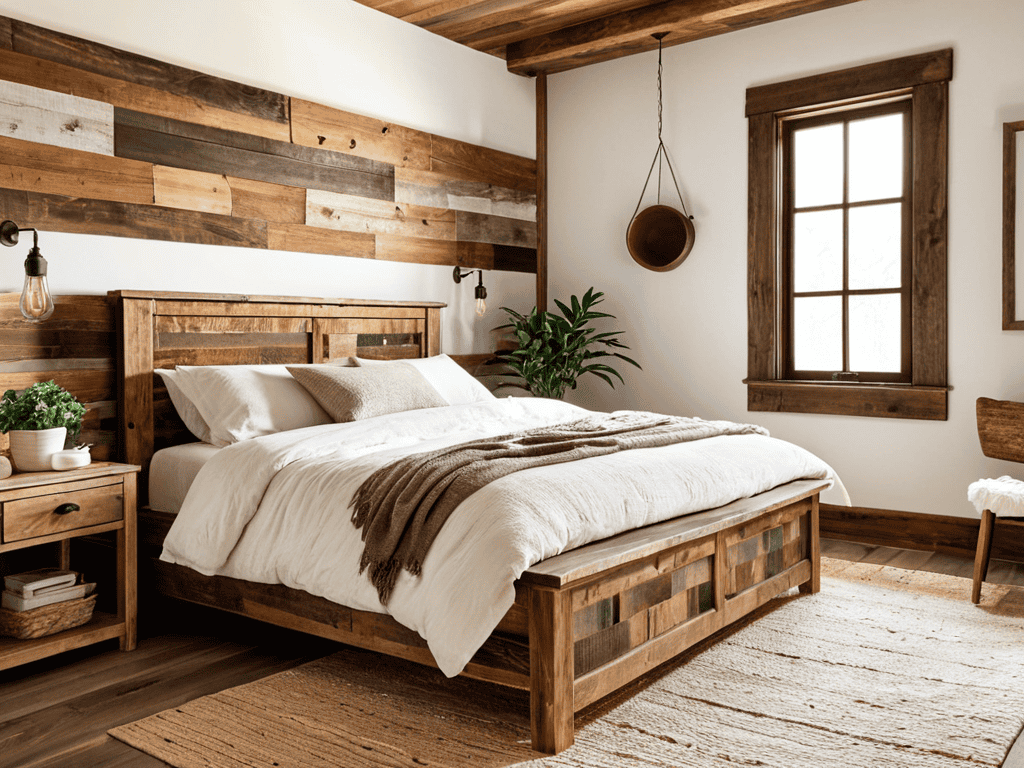
When it comes to creating a unique headboard, reclaimed wood headboard designs are a great option. You can use old wooden doors, fences, or even pallets to create a one-of-a-kind piece. For a more rustic look, consider adding some distressed finishes to give your headboard a vintage feel. This will not only add character to your bedroom but also make the space feel cozier.
If you’re looking for a more modern take, upcycled pallet headboard ideas can be a great starting point. You can use pallets to create a sleek and minimalist headboard that adds a touch of industrial chic to your bedroom. To add some extra flair, consider incorporating fabric headboard diy projects into your design. This can include adding upholstered panels or even a tufted detail to give your headboard some extra texture and visual interest.
For those on a budget, rustic headboard ideas on a budget can be a great way to create a beautiful headboard without breaking the bank. Consider using affordable materials like plywood or MDF, and get creative with paint and stains to add some color and texture to your design. You can also add some functional elements, like a headboard with storage plans, to make your headboard a practical and stylish addition to your bedroom.
Reclaimed Wood Headboard Designs
Reclaimed wood headboard designs add a touch of rustic charm to any bedroom. I’m particularly fond of using old pallets or barn doors to create a unique headboard. The weathered wood gives the room a cozy, vintage feel that’s hard to replicate with new materials. You can stain or paint the wood to match your bedroom’s aesthetic, or leave it as is for a more distressed look.
This style works well with a variety of decorating themes, from farmhouse chic to industrial modern. Plus, repurposing old wood is an eco-friendly way to reduce waste and create something truly one-of-a-kind. Whether you’re a seasoned DIY enthusiast or a beginner, reclaimed wood headboard designs are a great way to add some personality to your bedroom.
Upcycled Pallet Headboard Ideas
I love how upcycled pallets can add a touch of rustic charm to any bedroom. You can disassemble the pallets and use the wooden planks to create a unique headboard design. For a more modern look, consider painting or staining the pallet wood to match your bedroom’s color scheme. This eco-friendly option not only reduces waste but also adds a personal touch to your space. With a little creativity, upcycled pallets can be transformed into a one-of-a-kind headboard that reflects your personal style.
Headboard Hacks to Die For: 5 Tips to Elevate Your DIY Game
- Measure Twice, Drill Once: Double-Check Your Bed Frame and Wall Space Before Starting Your DIY Headboard Project
- Get Creative with Materials: Think Beyond Traditional Wood and Explore Options Like Reclaimed Metal, Vintage Windows, or Even Fabric
- Add Some Serious Wow Factor with Lighting: String Lights, Fairy Lights, or LED Strips Can Take Your Headboard from Meh to Mesmerizing
- Don’t Be Afraid to Mix and Match Styles: Combine Different Textures, Patterns, and Eras to Create a One-of-a-Kind Headboard that Reflects Your Personality
- Take It to the Next Level with Finishing Touches: Add Some Greenery, a Statement Piece of Art, or a Few Favorite Mementos to Make Your Headboard a True Focal Point in the Room
Key Takeaways for a Show-Stopping DIY Headboard
I’ve learned that with a little creativity, you can turn any old material into a unique headboard, like upcycling an old door or pallets into a one-of-a-kind piece
Reclaimed wood headboard designs offer a rustic and cozy touch to any bedroom, and can be easily customized to fit your personal style and decor
Whether you’re a seasoned DIY rockstar or a beginner, these DIY headboard ideas and hacks can help you unleash your inner decorator and create a bedroom that truly reflects your personality
A Labor of Love
There’s something undeniably special about drifting off to sleep beneath a headboard that’s been crafted with your own two hands – it’s a reminder that even in the stillness of the night, our personal touch can be a powerful catalyst for comfort and tranquility.
Ava Morales
Bringing Your Vision to Life
As we’ve explored the world of DIY headboard ideas, it’s clear that the possibilities are endless. From reclaimed wood headboard designs that add a touch of rustic charm to upcycled pallet headboard ideas that showcase your creativity, there’s a project out there for everyone. Whether you’re a seasoned DIY enthusiast or a beginner looking to dip your toes into the world of home decor, the key to success lies in embracing your unique style and having fun with the process. By following the steps and ideas outlined in this guide, you’ll be well on your way to creating a one-of-a-kind headboard that reflects your personality and adds a personal touch to your bedroom.
The most important thing to remember as you embark on your DIY headboard journey is to let your imagination run wild. Don’t be afraid to think outside the box and try new things – it’s often the unconventional ideas that lead to the most stunning results. As you bring your vision to life, remember that it’s okay to make mistakes and that the process is just as important as the end result. With patience, creativity, and a willingness to take risks, you’ll be able to create a truly unique and beautiful headboard that you’ll cherish for years to come.
Frequently Asked Questions
What are some affordable and easy-to-find materials for a DIY headboard?
I’m all about repurposing stuff I already have, like old pallets, doors, or even fabric scraps. You can also score amazing deals on reclaimed wood, plywood, or MDF at thrift stores or Habitat for Humanity ReStores. And don’t forget about IKEA hacks – those affordable furniture pieces can be transformed into unique headboards with a little creativity!
How do I ensure my DIY headboard is sturdy and securely attached to the wall?
To ensure your DIY headboard is sturdy and secure, use wall anchors or brackets that can hold the weight of your headboard, and attach them to the wall studs for maximum support.
Can I use any type of wood or material for a reclaimed wood headboard, or are there specific recommendations?
Honestly, not all woods are created equal for reclaimed headboards. I swear by old oak, pine, or maple for their unique textures and character. Avoid super-soft woods like cedar or cypress, as they can be too prone to damage. And don’t even get me started on pressure-treated wood – it’s a total no-go!