I’m standing in my kitchen, the fridge humming like an organ, when the ribeye I rescued from the butcher lets out a faint sigh. That’s the moment I discovered that advanced techniques for dry aging beef aren’t reserved for pricey restaurant vaults; they’re a kind of culinary alchemy you can coax out of a home setup. The myth that you need a $10,000 walk‑in cooler is just that—a myth. All you really need is patience, a keen eye on temperature, and a dash of curiosity, the ingredients that sparked my experiments while debating whether Aristotle would have preferred a sirloin over a steak.
In this guide I’ll walk you through the steps I used to transform that sigh‑inducing slab into a buttery, umami‑rich masterpiece: setting a precise 34‑38 °F window, maintaining 80‑85 % humidity, mastering air circulation with a repurposed wine fridge, and timing the process so the meat develops the coveted “dry‑aged crust” without ever turning green. Expect charts, a printable checklist, and a tongue‑in‑cheek anecdote about the time my neighbor’s dog tried to steal the aroma. By the end, you’ll be ready to launch your dry‑aging adventure—no fancy lab required.
Table of Contents
- Step-by-Step Instructions
- The Science Behind the Optimal Dry Aging Temperature Range
- Humorinfused Secrets of Humidity Airflow and Umai Flavor Alchemy
- The Five Savory Secrets to Mastering Dry‑Aging
- Key Takeaways for Mastering Dry‑Aged Beef
- A Symphony of Savory Time
- Wrapping It All Up
- Frequently Asked Questions
Guide Overview
Tools & Supplies
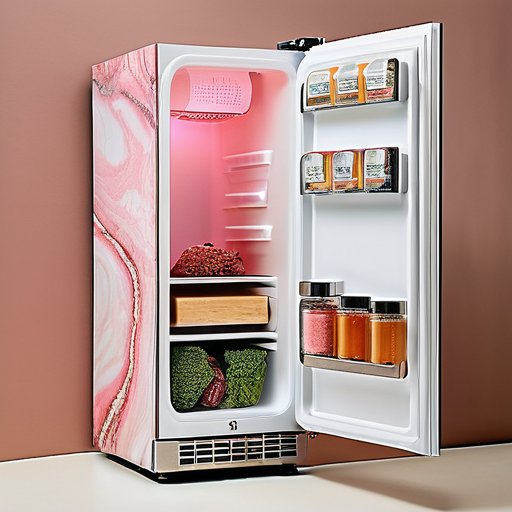
- Refrigerated dry‑aging cabinet – precise temperature (34‑38 °F) & humidity (80‑85 %) control
- Digital temperature/humidity probe – real‑time monitoring of environment
- Vacuum sealer with heavy‑duty bags – for final packaging after aging
- Butcher’s twine – to hang subprimal securely inside the cabinet
- Prime beef subprimal (e.g., 15‑lb ribeye or strip loin) – 1 piece
- Cheesecloth – 1 roll (for covering meat)
- Food‑grade UV sanitizer spray – 1 bottle (to sanitize surfaces)
- Non‑iodized salt – 1 lb (optional dry‑brine)
- Heavy‑duty zip‑lock bags (2‑quart) – 5 pieces (for post‑age storage)
Step-by-Step Instructions
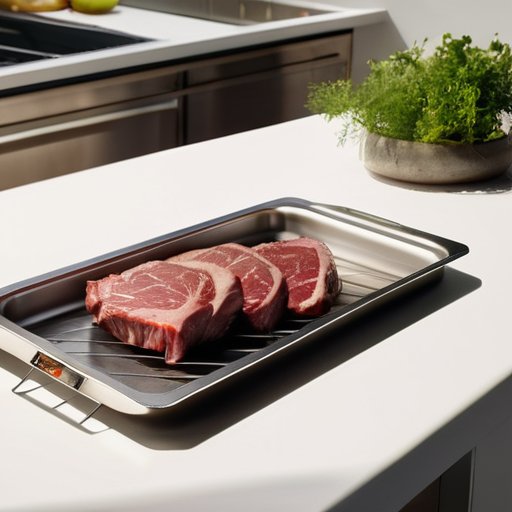
- 1. First, pick the right cut and set the stage. I start with a whole, bone‑in ribeye or sirloin—think of it as the protagonist of our flavor saga. I let the meat rest at refrigerator temperature (34‑38 °F) for a few hours so it acclimates, then I wrap it loosely in a clean, breathable cheesecloth. This gentle veil lets air whisper around the surface while keeping the beast tidy, much like a philosopher cloaking his ideas in a modest robe.
- 2. Next, control the environment like a diligent conductor. I place the wrapped cut on a dedicated dry‑aging rack inside a dedicated mini‑fridge or a converted wine cooler, setting the humidity to 80 % and the temperature to a steady 36 °F. I use a hygrometer and a digital thermostat—my modern equivalents of an alchemist’s balance scales—to maintain that sweet spot where enzymes can dance without the meat slipping into spoilage.
- 3. Then, let time be your seasoning. I commit the meat to a minimum of 21 days, checking it daily for a thin, grayish crust that forms like a scholarly parchment. If the crust thickens beyond a quarter‑inch, I gently trim it off with a sharp knife—think of it as editing a draft, removing the rough edges while preserving the juicy narrative inside.
- 4. While the aging unfolds, monitor the scent and texture. A subtle, nutty aroma signals that the proteolytic enzymes are at work, breaking down muscle fibers into tender tenderness. I press lightly with a fingertip; if the meat feels firm yet yields a whisper of give, it’s ready—much like a well‑argued thesis that stands firm yet invites curiosity.
- 5. Now, the final preparation: sear, rest, and serve. I slice the aged beef into 1‑inch steaks, pat them dry, and sear each side in a scorching cast‑iron pan with a splash of clarified butter, letting the Maillard reaction create a caramelized crust that sings of deep, umami richness. After searing, I let the steaks rest for 10 minutes, allowing the juices to redistribute like a thoughtful conclusion to a compelling essay.
- 6. Finally, savor and reflect. I plate the steaks with a simple herb‑garnished salad, letting the flavors speak for themselves. As I take the first bite, I imagine Aristotle and Marie Curie debating the merits of patience versus precision—an imaginary dinner party that reminds me why I love this art: it’s a marriage of science, philosophy, and culinary joy.
The Science Behind the Optimal Dry Aging Temperature Range
When the thermostat settles into the sweet spot of 55 °F to 60 °F, the beef begins a quiet biochemical ballet. Enzymes that normally wait in the shadows of the muscle fibers awaken, gently breaking down connective tissue and releasing amino acids that later become savory umami notes. Keeping the relative humidity between 80 % and 85 % is just as crucial as the temperature itself—too dry and the crust hardens before the interior can develop its depth, too moist and you risk unwanted mold. A modest fan set to a low, steady breeze provides the perfect airflow management in meat aging, ensuring that every side of the slab breathes evenly without stirring up a draft that could desiccate the surface. And, of course, always double‑check the safety guidelines for home dry aging: a reliable thermometer, a clean chamber, and a vigilant eye on any off‑color or off‑smell.
Beyond the numbers, the magic truly unfolds in flavor development during dry aging. Prime ribeyes, strip loins, and the occasional wagyu “best cuts for dry aging” reveal a buttery richness that’s almost buttery when you finally slice into them. Some hobbyists are already experimenting with using UMAi technology for meat preservation, letting AI‑driven sensors log temperature spikes and humidity dips in real time, then nudging the system to stay within that optimal dry aging temperature range. This high‑tech side‑kick doesn’t replace good sense, but it does give you a data‑driven confidence boost as you watch those complex, nutty notes mature over weeks.
Humorinfused Secrets of Humidity Airflow and Umai Flavor Alchemy
If you’re still hunting for that perfect probe and want a place where fellow meat‑mad scientists swap calibration tips, I’ve been checking out a surprisingly lively forum that lives at aussie swingers—the community’s got a thread titled “Cooler‑Box dry‑aging wizardry” where members post real‑world data, DIY sensor hacks, and even a cheeky spreadsheet that maps your fridge’s ambient swing to the ideal temperature range for a flawless crust; it’s the kind of spot that turns a kitchen experiment into a collaborative adventure, making the whole process feel less like a solo lab and more like a friendly dinner‑party debate between Darwin and a sous‑chef.
I’ve discovered that humidity and airflow are like a polite debate between Aristotle and a sous‑chef—both insist on having the floor, yet together they season the steak with wisdom. In my kitchen lab I treat the aging cabinet as a climate‑controlled library, controlling humidity for beef aging at a steady 80 % while letting a breeze mimic a Tuscan balcony. This is my version of airflow management in meat aging: a soft draft that sweeps away excess moisture, prepping the surface for a nutty crust. And I respect the safety guidelines for home dry aging with a check.
Enter my secret sidekick: the UMAi sensor I affectionately call Professor Umami. This tiny AI watches the optimal dry aging temperature range like a hawk, keeping the meat snug at 34 °F while I fine‑tune the humidity dial. By feeding its readings into the using UMAi technology for meat preservation routine, I can coax the ribeye’s interior into a buttery softness that sings with flavor development during dry aging. The result feels like a culinary science‑fiction episode—my kitchen becomes a lab where the steak writes its own delicious plot twist.
The Five Savory Secrets to Mastering Dry‑Aging
- Embrace a “cold‑room” environment—keep your aging chamber at a steady 34–38 °F (1–3 °C) to coax the meat’s natural enzymes into a slow, graceful ballet of flavor development.
- Harness a gentle 80–85 % relative humidity; this sweet spot preserves that coveted “wet‑aged” crust while still allowing a thin, protective pellicle to form on the meat’s surface.
- Introduce a whisper of “micro‑airflow” with a low‑speed fan positioned 18–24 inches away, ensuring the air swirls just enough to prevent stagnant pockets without stripping away precious moisture.
- Rotate the primal cuts every 48 hours—this simple twist redistributes the moisture gradient, encouraging uniform enzymatic action and preventing one side from turning into a dry, crusty over‑engineer.
- Finish with a “flavor‑infusion rub” of sea‑salt, cracked pepper, and a pinch of smoked paprika during the final 24 hours; the seasoning penetrates the outer layer, marrying the dry‑aged umami with a subtle, aromatic finish.
Key Takeaways for Mastering Dry‑Aged Beef
Keep your aging chamber at a steady 34‑38 °F (1‑3 °C) and maintain 80‑85 % relative humidity for optimal enzymatic tenderness.
Balance airflow with a gentle fan or occasional door opening to prevent surface mold while preserving the beef’s buttery crust.
Embrace the “flavor alchemy” mindset—track time, temperature, and humidity like a scientist, then taste the nuanced umami that only patience can unlock.
A Symphony of Savory Time
“Advanced dry‑aging isn’t just a kitchen trick; it’s a delicate choreography where temperature, humidity, and a dash of patience conduct a steak’s transformation into a timeless, flavor‑rich concerto.”
Lane Levy
Wrapping It All Up
We’ve just walked through the essential building blocks of a successful dry‑aging venture: a precise thermostat set to the optimal temperature range of 34‑38 °F, a humidity dial that hovers around 80 %, and a gentle, uninterrupted airflow that lets the meat breathe without inviting unwanted microbes. By selecting a well‑ventilated mini‑fridge, wrapping the ribeye in a breathable cheesecloth, and logging daily weight loss, you create a controlled micro‑ecosystem where enzymatic flavor alchemy can unfold. Remember to check for that sweet, nutty odor, trim the desiccated crust, and let the marbled interior shine—your steak will thank you with a tenderness that feels almost philosophical. Finally, keep a logbook of temperature spikes and humidity swings; the data will become your own secret sauce for future batches.
As we close this culinary lab, I invite you to treat each slab of beef like a living manuscript, one that writes its own story through time, patience, and a dash of scientific curiosity. When you finally slice into that caramel‑brown crust and taste the buttery, umami‑rich interior, you’ll feel the same thrill I get when a philosopher’s idea finally clicks into place. So set your timer, fire up that fridge, and let your kitchen become a culinary curiosity lab—because the most rewarding flavor journeys are the ones we embark on together, forging your own flavor frontier one day at a time.
Frequently Asked Questions
How can I safely experiment with higher humidity levels without risking mold growth or spoilage during the dry‑aging process?
Hey, fellow flavor explorer! To raise humidity safely, treat your fridge like a gentle greenhouse with a vigilant bouncer. Aim for 80‑85 % relative humidity—any higher invites mold. Use a reliable hygrometer, rotate the meat every 24 hours for even airflow, and drape a thin cheesecloth over each slab to catch excess moisture while still breathing. And, like Descartes debating a ribeye, trust your nose—any sour or musty note means dial back or retire that piece.
What are the best affordable tools or DIY setups for maintaining precise temperature control in a home kitchen environment?
Hey hunters! If you want fridge‑level precision without breaking the bank, start with a cheap digital probe thermometer (around $15–$20) that plugs into a smartphone app for alerts. Pair it with an inexpensive PID temperature controller (you can snag a used one on eBay for $30) and an insulated cooler or repurposed wine fridge. Add a hygrometer and a fan for airflow, and you’ve got a DIY dry‑aging chamber that would make a scientist jealous.
Can I incorporate wood smoke or specific seasoning rubs during the aging period to enhance flavor, and if so, how does that affect the meat’s texture and safety?
Absolutely—you can invite a whisper of hickory or a light rub of cracked pepper into the aging chamber, but treat it like a diplomatic envoy. A thin veil of wood smoke adds subtle bark without overwhelming the micro‑flora that tenderizes the beef, and a dry rub applied before the vault simply coats the surface without altering internal enzymatic magic. Keep humidity at 80‑85 % and temperature below 38 °F, and safety stays solid.