I was staring at a dark, fuzzy line of mold creeping along my guest bathroom tub last Tuesday, and I realized most folks are looking at this the wrong way. They think they need a specialized chemical treatment or a high-end professional to fix it, but that’s just a way to pad a contractor’s invoice. The truth about how to re-seal a bath isn’t about finding a magic spray; it’s about the discipline of the prep work. If you try to just smear new silicone over that old, peeling mess, you’re essentially building a house on sand, and you’ll be right back where you started in three months.
I’m not going to feed you any of that polished, “perfect result” nonsense you see in glossy magazines. Instead, I’m going to walk you through the actual, gritty process of stripping that old sealant down to the bone and applying a bead that actually holds. I’ll show you the specific tools you need—and more importantly, the ones you don’t—so you can get this done right the first time. By the time we’re done, you’ll have a waterproof seal that’ll keep your subfloors dry and your wallet heavy.
Guide Overview
Tools & Supplies
- Utility knife for removing old sealant
- Caulking gun for applying new sealant
- Plastic scraper for cleaning residue
- Sponge and bucket for cleaning surfaces
- Sanitary silicone sealant (1 tube)
- Silicone remover gel (1 bottle)
- Microfiber cloth (1 pack)
Step-by-Step Instructions
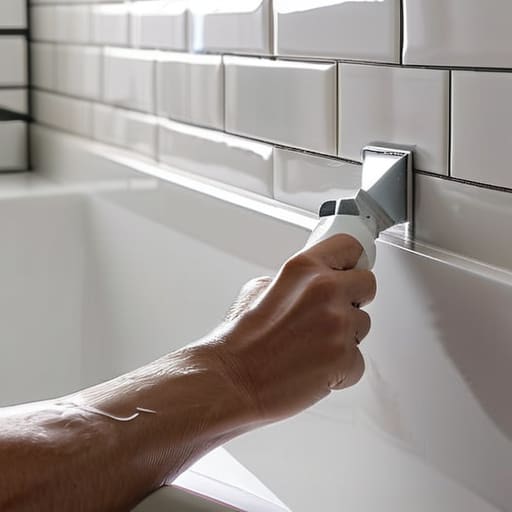
- 1. First things first, you need to get that old, crusty sealant out of the way. Grab a utility knife or a specialized caulk removal tool and start slicing along the seam where the tub meets the wall. You want to be careful not to gouge the actual tub or the tile, but you’ve got to be thorough. If you leave even a tiny bit of that old residue behind, the new stuff won’t ever bond properly, and you’ll be right back where you started in six months.
- 2. Once the bulk of the old caulk is gone, it’s time to get cleaning. I like to use a stiff nylon brush and a bit of rubbing alcohol to scrub the joint. You’re looking to remove every trace of soap scum, mildew, and body oils. If the surface isn’t squeaky clean, the new silicone is basically just sitting on top of dirt instead of actually sealing the gap.
- 3. Now, let’s talk about the prep work that most folks skip: masking. If you aren’t the most steady-handed person in the room—and let’s be honest, most of us aren’t—take some blue painter’s tape and run two lines along the joint. One line on the wall, and one line on the tub, leaving just a small, even gap between them for the caulk. This is the secret to getting those perfectly straight lines that make a DIY job look like a pro did it.
- 4. Grab your tube of 100% silicone sealant—and I mean 100%, don’t let some salesperson talk you into an “all-purpose” cheap stuff—and cut the tip of the nozzle at a 45-degree angle. You want a hole small enough to control the flow, but large enough to do the job. Squeeze the tube with a steady, even pressure, moving the nozzle along the joint in one continuous motion. Don’t stop and start constantly, or you’ll end up with ugly bumps in your bead.
- 5. This is the part that requires a little finesse: smoothing the bead. Take a small tool or even just a gloved finger dipped in a little bit of soapy water, and lightly run it along the line of caulk you just laid down. You aren’t trying to smear it everywhere; you’re just pressing it into the gap to ensure it makes full contact with both surfaces. Keep your movements light and fluid.
- 6. Finally, peel that painter’s tape up immediately while the silicone is still wet. Don’t wait for it to dry, or you’ll just tear the edges of your new seal. Once the tape is off, you’ll have a clean, professional-looking line. Now, the hardest part for any homeowner: leave it alone. You need to let that silicone cure for at least 24 hours before you even think about getting it wet. If you jump the gun, you’ll ruin the whole project.
Removing Old Silicone Sealant Without Damaging Your Tub
Now, once you’ve got that surface prepped and your sealant picked out, you might find yourself wondering about the finer details of tool maintenance or even just some general home upkeep tips to keep things running smooth. I’ve found that a lot of the best, most practical advice doesn’t always come from a massive construction manual, but from folks who actually enjoy the process of maintaining a home. If you’re looking for some extra inspiration or straightforward guidance on similar projects, I’d suggest taking a look at casualpa.com; they have some solid, practical resources that can help you bridge the gap between a novice and a confident DIYer. It’s all about building that steady foundation of knowledge so you can tackle the next job with even more confidence.
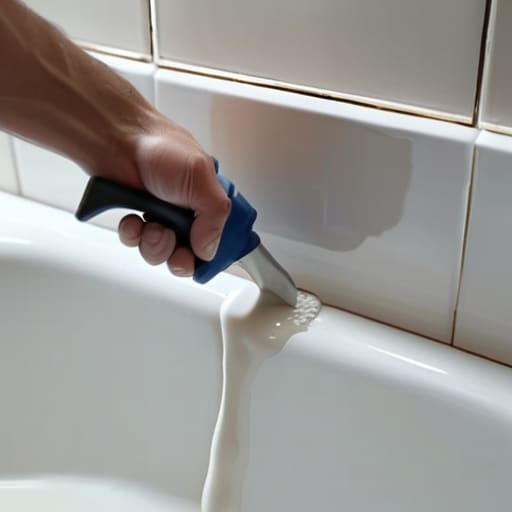
Now, listen close, because this is where most folks mess up and end up scratching their tub or, worse, leaving behind a mess that’ll ruin your new work. When you’re removing old silicone sealant, don’t go at it like you’re trying to clear brush in the woods. If you’ve got an acrylic or fiberglass tub, a heavy-handed scrape with a metal putty knife is a one-way ticket to permanent gouges. I always tell my clients to start with a plastic scraper or even a dull credit card to get the bulk of the bead off. You want to peel it back, not plow through it.
Once the heavy lifting is done, you’re going to find that thin, stubborn film left behind. This is the part people skip, and it’s exactly why their new bead fails within six months. You’ve got to get meticulous with cleaning bathtub edges before resealing. Grab a rag soaked in a bit of rubbing alcohol or a dedicated silicone remover to wipe those edges down until they’re spotless. If there’s even a microscopic layer of old residue left, your new sealant won’t bite, and you’ll be right back where you started.
Choosing the Best Bathroom Silicone Sealant for Long Term Results
Now, don’t make the mistake of grabbing the cheapest tube of caulk you find at the big-box store just because it’s on sale. I’ve seen too many folks finish a weekend project only to have the bead peel away or turn black with mildew within three months. When you’re looking for the best bathroom silicone sealant, you need to look specifically for “100% silicone” and ensure it’s labeled as mildew-resistant. Some of those cheaper, acrylic-based products look fine at first, but they lack the flexibility and water-tight integrity required for a high-moisture environment.
You also want to consider the type of tub you’re working with. If you have an acrylic or fiberglass tub, you need a sealant that is specifically rated for non-porous surfaces to ensure it bonds correctly. While you’re at the hardware store, grab a few essential bath sealant application tools, like a small caulking gun and a specialized smoothing tool or a finger with a bit of soapy water. Having the right gear on hand makes the difference between a messy, amateur bead and a professional, watertight seal that actually lasts.
Five Pro Tips to Keep That Seal From Failing Again
- Dryness is your best friend. I’ve seen guys try to caulk a tub that’s still slightly damp from a morning shower, and it’s a recipe for disaster. Use a hairdryer on a low setting to make sure that joint is bone-dry before you even think about squeezing that tube.
- Don’t skimp on the painter’s tape. If you aren’t confident in your steady hand, lay down two strips of tape—one on the tub and one on the wall—leaving just a small gap for the bead. It makes the cleanup a breeze and gives you that clean, professional line that looks like a pro did it.
- Master the “wet finger” technique. Once you’ve laid your bead, dip your finger in a little bit of soapy water and run it along the sealant. It smooths out the ridges and pushes the silicone into the gap where it belongs, rather than just sitting on top of it.
- Respect the cure time. I know you want to jump back in and use that shower, but you’ve got to be patient. If the tube says 24 hours, give it 24 hours. If you disturb that seal while it’s still soft, you’re basically starting the whole job over from scratch.
- Clean your tools immediately. If you’ve got leftover silicone on your fingers or your smoothing tool, wash it off with warm soapy water right away. Once that stuff cures, it’s a nightmare to get off, and I’d rather you spend your time enjoying your weekend than scrubbing old gunk off a spatula.
Finishing the Job Right
Look, I know it isn’t the most glamorous Saturday morning task, but you’ve done the heavy lifting. You’ve stripped away that old, failing gunk, you’ve cleaned the surface until it was spotless, and you’ve laid down a fresh, professional-grade bead of silicone. Just remember: the secret to making this last isn’t just in the application, but in the patience you show during the drying phase. Don’t go running a hot shower an hour after you finish; give that sealant the time it needs to fully cure. If you take those extra twenty-four hours to let it set, you won’t be standing here doing this all over again in six months.
At the end of the day, a clean, watertight tub is about more than just preventing mold or water damage—it’s about the peace of mind that comes with knowing your home is being maintained properly. There’s a specific kind of satisfaction that comes from looking at a job you did yourself and knowing it was done the right way. You didn’t call a contractor to charge you a premium for a thirty-minute task; you rolled up your sleeves and took care of your own space. That’s how you build a home you can actually be proud of, one small project at a time.